Yuva Theme. Currently, only text can be displayed, as shown in below.
Store URL if needed: 5c252b-bc.myshopify.com
The style I want is as this, with icons combined with text, and clicking on the text can also pop up a copy introduction.
URL if needed: carawayhome.com/products/cookware-sets
I would be most grateful for your help.
1 Like
Hey @OneChefOn ,
Replicate this look on your product page under “Highlights” or “Overview”:
Follow These Steps:
-
Online Store
-
Themes
-
Edit code
-
Look inside the Section or Snippets folder
-
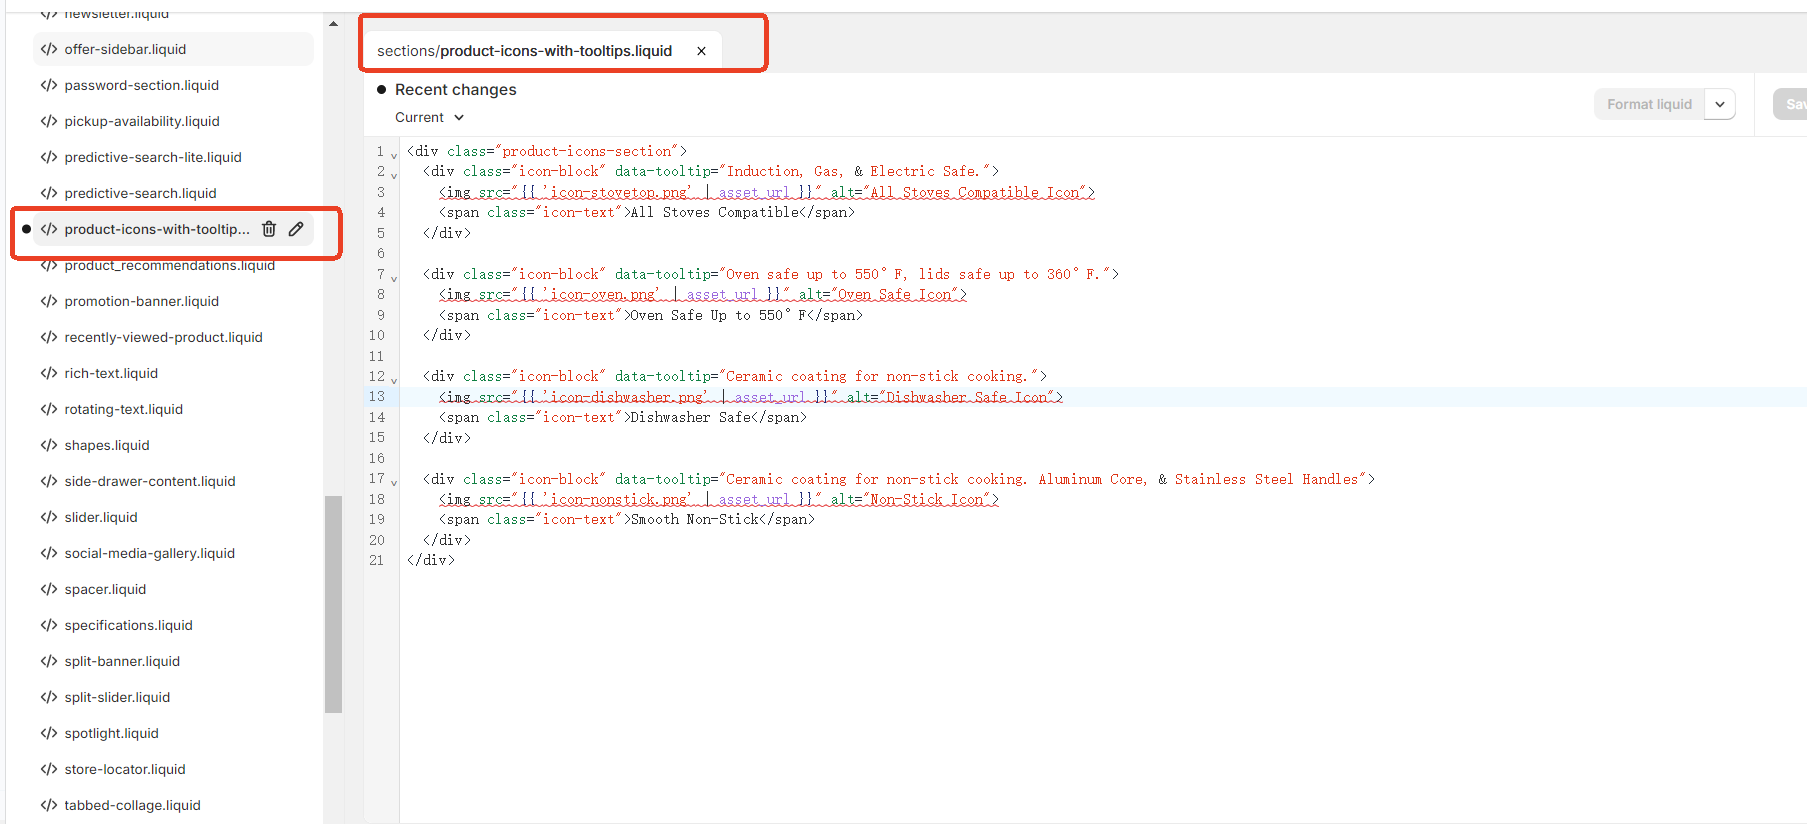
Create or Edit Section Like product-icons-with-tooltips.liquid
Here’s a working structure you can paste into your theme section:
    Stovetop Agnostic


    Oven Safe Up to 550°F


    Non-Stick
CSS Styling (add to base.css or custom CSS file)
.product-icons-section {
  display: flex;
  flex-wrap: wrap;
  gap: 20px;
  margin: 20px 0;
  justify-content: flex-start;
}

.icon-block {
  position: relative;
  display: flex;
  flex-direction: column;
  align-items: center;
  width: 100px;
  cursor: pointer;
}

.icon-block img {
  width: 40px;
  height: 40px;
  margin-bottom: 8px;
}

.icon-text {
  font-size: 14px;
  text-align: center;
}

/* Tooltip styling */
.icon-block::after {
  content: attr(data-tooltip);
  position: absolute;
  bottom: 125%;
  background-color: #333;
  color: #fff;
  padding: 6px 10px;
  border-radius: 4px;
  font-size: 12px;
  white-space: nowrap;
  opacity: 0;
  transform: translateY(10px);
  transition: all 0.3s ease;
  pointer-events: none;
  z-index: 10;
}

.icon-block:hover::after {
  opacity: 1;
  transform: translateY(0);
}
If you want help to implement this, please feel free to reach out. Thanks!
Best Regards,
Rajat
Thank you so much for your detailed reply. I added “product-icons-with-tooltips.liquid” section at Sections as in the screenshot. I’m wondering what to do next? Because even if I follow your reply to add to custom CSS file, it doesn’t work.
I need to explain that it would be better if a customizable icon with text section could be created under the “Product page” section of the product page, because the icon with text content of different products is different. I don’t know if I have expressed my meaning clearly, and I look forward to your reply.
Thanks for the clear screenshots — you’ve explained it perfectly!
You’re right: since different products need different icon + text combinations, the best solution is to make the Icons with Tooltip section dynamic and customizable via the theme editor per product.
What You Should Do Next (Dynamic Solution):
Use a Custom Block-Based Section
Update your product-icons-with-tooltips.liquid file like this:
{% schema %}
{
  "name": "Product Icons with Tooltips",
  "max_blocks": 6,
  "blocks": [
    {
      "type": "icon_item",
      "name": "Icon with Tooltip",
      "settings": [
        {
          "type": "image_picker",
          "id": "icon",
          "label": "Icon Image"
        },
        {
          "type": "text",
          "id": "label",
          "label": "Icon Label"
        },
        {
          "type": "text",
          "id": "tooltip",
          "label": "Tooltip Text"
        }
      ]
    }
  ],
  "presets": [
    {
      "name": "Product Icons with Tooltips",
      "category": "Product"
    }
  ]
}
{% endschema %}

  {% for block in section.blocks %}


      {% if block.settings.icon != blank %}

      {% endif %}
      {{ block.settings.label }}


  {% endfor %}
Add CSS to Theme File (base.css or theme.css)
.product-icons-section {
  display: flex;
  flex-wrap: wrap;
  gap: 20px;
  margin-top: 20px;
}
.icon-block {
  position: relative;
  display: flex;
  flex-direction: column;
  align-items: center;
  text-align: center;
  width: 100px;
  cursor: pointer;
}
.icon-block img {
  width: 40px;
  height: 40px;
  margin-bottom: 6px;
}
.icon-block::after {
  content: attr(data-tooltip);
  position: absolute;
  bottom: 125%;
  left: 50%;
  transform: translateX(-50%);
  background: #333;
  color: #fff;
  padding: 6px 10px;
  border-radius: 4px;
  font-size: 12px;
  white-space: nowrap;
  opacity: 0;
  transition: opacity 0.3s ease;
  pointer-events: none;
  z-index: 10;
}
.icon-block:hover::after {
  opacity: 1;
}
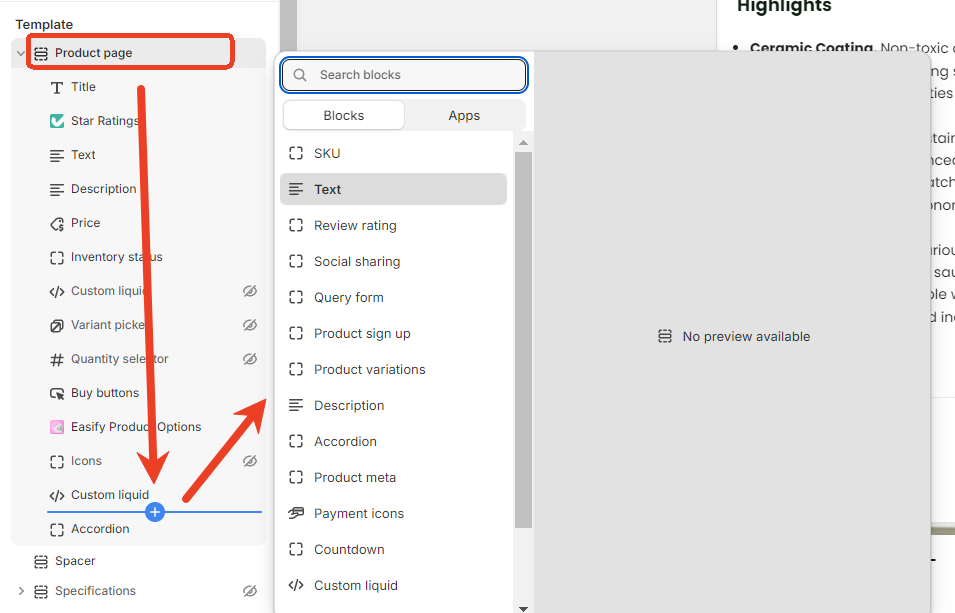
Now in the Theme Editor:
-
Go to Product page
-
Click “Add block” → “Product Icons with Tooltips”
-
For each block:
-
Upload icon
-
Enter text (e.g. “Stovetop Agnostic”)
-
Enter tooltip (e.g. “Safe for all stovetops”)
You can customize this per product template if needed!
Let me know if you want to show this only for specific products or pull icon data from metafields for a more automated setup & If you want help to implement this, feel free to reach out. Thanks!
Thank you for your reply. But I still found some problems. This custom section is still not under the “Product page” Section and cannot be dragged below the add to cart button. Meanwhile, I didn’t understand where to add css in the Theme File, because I hadn’t found base.css and theme.css. In addition, when clicking on the copy, no text pops up. Looking forward to your reply.