Hello shopify team, currently we are selling some gift cards to our customers, and we want to make the e-mail they receive more christmas-related. I know in the “Language” section of the theme, we can modify some of the text of the mail (Not all), but we want to update the card image & text that currently are:
I’m Miles from the Social Care team at Shopify. Modifying your gift card image is something you can do in your Shopify admin, but it does require some coding. I’ll walk you through each step, but I want to start with some information if you’re unsure how to code.
If you’re using a paid theme, then your theme was made by a third-party developer and Shopify’s Support team can’t help you with it. If you need help customizing a paid theme, then consider hiring a Shopify Expert. Similar to free themes, some kinds of customizations aren’t supported because of limitations associated with the theme or Shopify admin.
To upload a new image for your gift card, follow these steps:
From your Shopify admin, go to Online Store > Themes.
Find the theme you want to edit, and click Actions > Edit code.
In the Assets directory, click Add a new asset: New asset menu
Click Choose File to browse to the new gift card image on your computer and upload it. We suggest using a simple filename, for example blue-giftcard.png.
Click Upload asset. The new gift card image will appear in your Assets directory. Take note of the file extension (.png or .jpg)
Attach picture to the gift card image.
In the Templates directory, click gift-card.liquid.
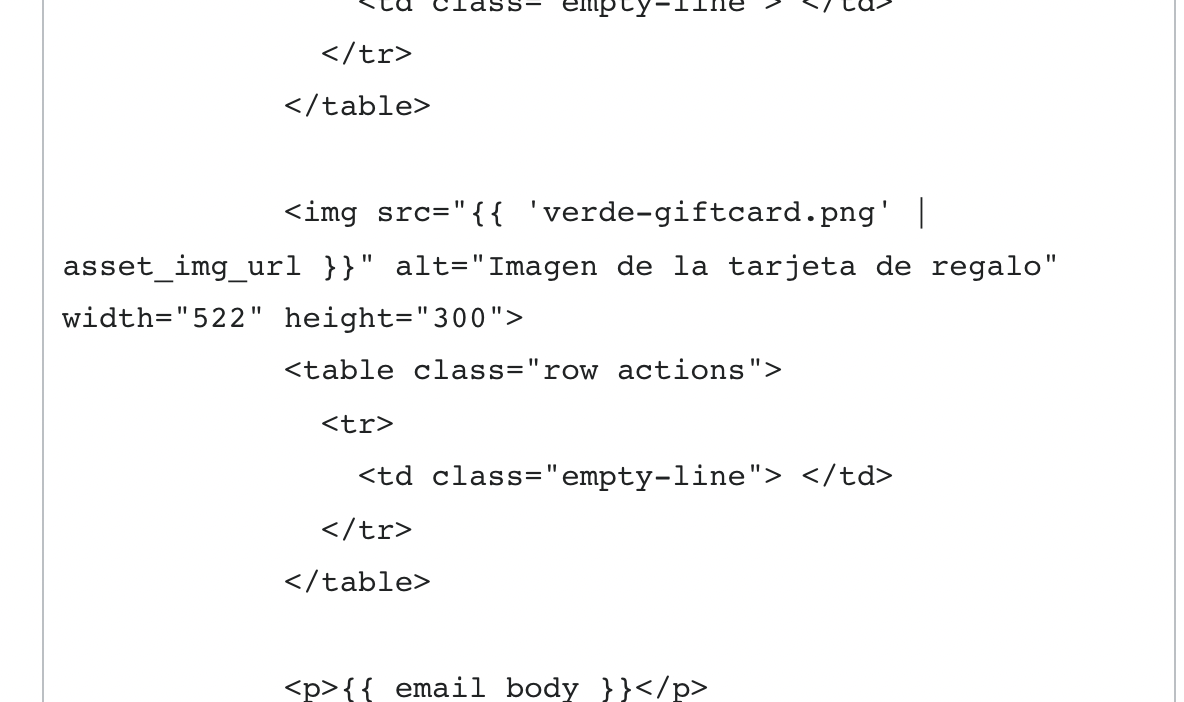
Find the following code within the file: <img src="{{ 'gift-card/card.jpg' | shopify_asset_url }}" alt="">
Replace it with the following: <img src="{{ 'blue-giftcard.png' | asset_img_url: '1024x1024' }}" alt="">
Click Save.
Note: Make sure to change “blue-giftcard.png” to the file name and extension of the new image as needed.
Preview your new gift card image.
From the theme code editor, in the top right-hand corner, click Customize theme.
Open the theme editor.
From the drop-down menu at the top of the page, or from the Templates menu on mobile, select Gift card.
I hope this helps! Please let me know if you need any assistance or get stuck at any step.
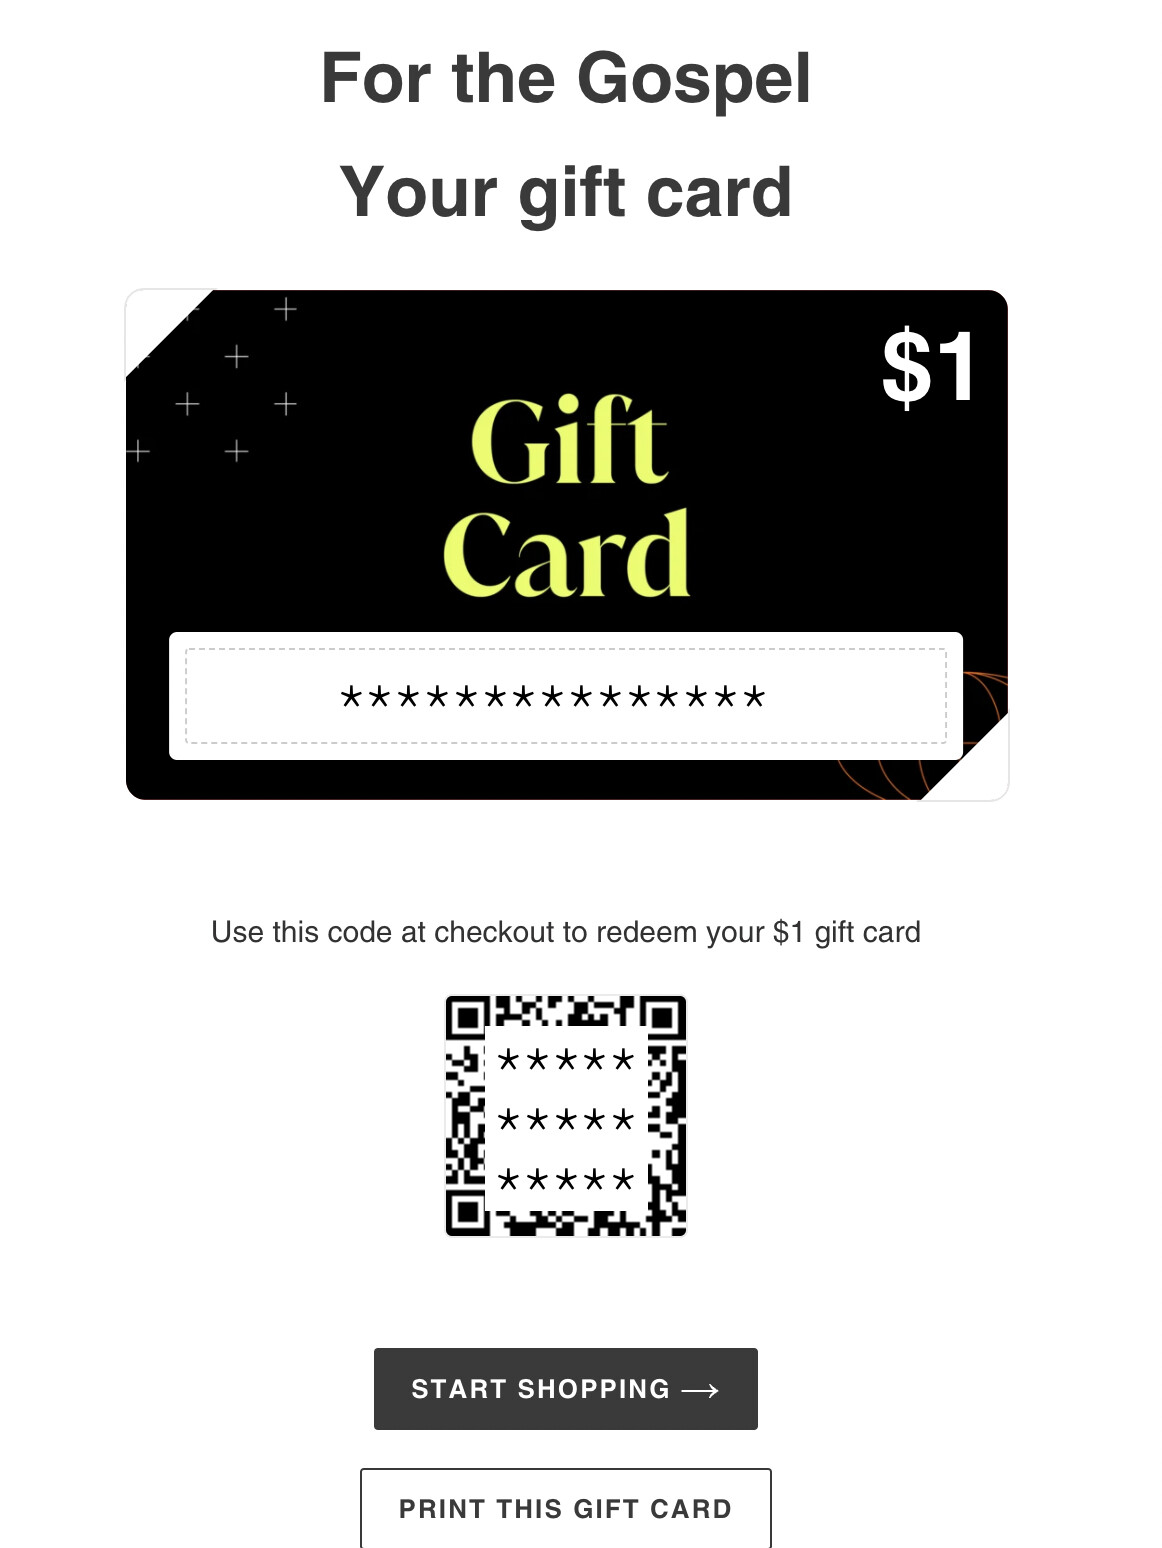
I will modify the image so the text and objects doesn’t get covered by the gift-card code. I just need an extra help: How can I modify the text color of the card price (top-right corner of the image)
I am looking for a way to change the image in the email the customer gets - not the gift card image on the webpage. I changed the image of the shop-page (with the solution above) but the image in the email is still the shopify-standard-picture. Any way to change this as well?
By the way: where is the text of the cift-card-email coming from? I cannot find the text in the language files.
You can change the email image and text as well. To do this, head over to Settings > Notifications and find the notification labelled “Gift card created”.
To change the image in the email, find the following code:
I have followed the steps shown above but it seems to break and now there is no image. I have tried with both a static image (jpeg) and a gif. Do you have any other suggestions as to what might be going wrong?
Also, is there a way to add our logo to the page? At the moment it just has our store name written in text.
Unfortunately not.
I had to contact shopify support for help in the end to make it into a readable size.
As for logo, you can change it at
Online Store > Themes > Customize Theme, click on Header from the new option panel on the left side. Then, you will see a box that will allow you to upload an image as your logo, or to input text below that box as your logo.
The sizing varies for desktop and mobile which you must change font sizing in the custom code though.
Hi was having hard time finding out how to change the image in my email aswell.
After playing around with it managed to get it to work changing the code in the email notification.
First you wanna add the image file for the gift card to your files list.
settings> files> upload files
once image has been uploaded click copy link on right hand side of the picture you uploaded.
then go to your email notification,
settings> notifications> gift card created.
scroll till you find
and replace with:
<img src=“https://ADD COPIED LINK HERE/“width=“240” height=“160” alt=””>
SAVE
This is the only way i have tried which does not show my image blurred. You can also play with how big you want the image by adjusting the 240 and 160.
Hi, after some trial and error I was able to figure it out!
In order to make your graphic visible on the “view gift card” and “print gift card” buttons, change the dimensions listed in the code (outlined in the yellow box) to reflect the dimensions of the graphic you created or the size that you would like it to be.
Also, if you are trying to customize the gift card graphic within the email itself and are ending up with a gigantic image when you preview, try entering thedefault dimensions into the code, not the dimensions that are shown in the instructions, and deleting the next row in the code.
FYI this process does not place your graphic in a gift-card-shaped frame, so you will need to design your image with rounded edges, if desired. (You can see the square edges it gave me initially).
thanks for your reply. I have done exactly that and in the preview, it turned out fine. However, when i resend the notification to myself again, it doesn’t show up on the email (the file appears to be broken). Do you know why that is?
I don’t understand and i have spent 2 hours trying to figure it out already.
This is a great answer, and helped me a lot. But this element you reference does not apply to all themes, so here’s a guide if someone is stuck.
These themes are most likely using their own assets instead of the shopify global asset for gift cards, as you referenced. This filename also may change!
If you’re having trouble finding the code, search for “gift-card/card.jpg” or “shopify_asset_url” in gift_card.liquid. If you can’t find this, you likely have an asset that your theme is referencing.
Duplicate your live theme and jump into the code editor for the duplicate. Don’t skip this step!
Find the gift card image in the assets folder. If it doesn’t exist, stop reading, this is not going to help.
a. Copy its name to a notepad
b. Delete the asset.
Prepare your own gift card image for upload…
a. Make sure your image width is a whole number multiplicative of 600. I recommend a 1200 width. DO NOT MAKE IT SMALLER THAN 600px WIDE.
a. Convert it to the filetype of your theme’s gift card image. (.jpeg, .png, etc.) You need to convert it with a program rather than renaming. Preview on mac does this through file > export.
b. IMPORTANT: name your image the same name as your theme’s gift card image.
Upload your gift card image to the assets folder, making sure it has the exact same name and extension as the image it is replacing.
Search for your gift card image’s name in gift_card.liquid
Replace…
x. asset_url with asset_img_url: ‘600x’ or
y. asset_img_url: ‘NUMBER’ with asset_img_url: ‘600x’
Save and publish.
Test.
Why change from asset_url?
asset_img_url can resize your images!
Why 600x?
This is the industry standard image width for email. Putting “x” after an integer will resize it proportionally to the width of the integer. If it makes your email look funky, change 600x to 1024x.