I’m using the Horizon theme and I want to add a text box to the product so customers can enter their personlisation text for the product. I got the ‘sidekick’ to create the text box block for me, which looks great, but the data entered is not showing in the cart. Could someone help me with what code I need to change/add to make sure this carries through to the cart?
Topic summary
A user needs help adding a personalization text box to products in the Horizon theme, where customer input appears in the cart. While Sidekick created the text box, the data doesn’t carry through to checkout.
Core Issue:
Horizon’s structure differs significantly from Dawn theme, making it unclear where to place the input code within the product form.
Technical Solutions Offered:
-
Direct code approach: Add an input field with
name="properties[Custom Text]"inside thebuy-buttons.liquidfile’s form tag, after the first input element. Include styling for better UX. -
JavaScript workaround: Since Horizon calculates form IDs based on Buy Buttons block ID (not accessible in Liquid), use JavaScript to dynamically link the input to the correct form by querying the form element and setting the
formattribute. -
Cart attributes method: Use
name="attributes[aditional_info]"instead of properties, then display inmain-cart.liquidusing{{ cart.attributes.aditional_info }}. This data carries through to orders.
App Alternatives:
Two apps were suggested (Easify Product Options and Inkybay) that handle personalization fields without coding, automatically displaying input in cart and checkout.
Status: Multiple solutions provided; implementation requires theme file editing with backup recommended.
That’s my problem. The files are very different in Horizon compared with Dawn, which I was previously using and has this coded and working properly. I have no idea where to put the code for either the product or cart. I can’t get anything to work.
Hi @Half-Geisha
If you’re trying to add a text box for personalization and want the entered text to show up in the cart, I’d recommend trying Easify Product Options. It lets you add custom input fields like text boxes with no coding needed, and the customer’s input will automatically appear in the cart, checkout, and order details.
It’s a super easy way to handle personalizations without having to mess with theme code or troubleshoot why custom fields aren’t carrying over. Here’s how it works:
- This is the result:
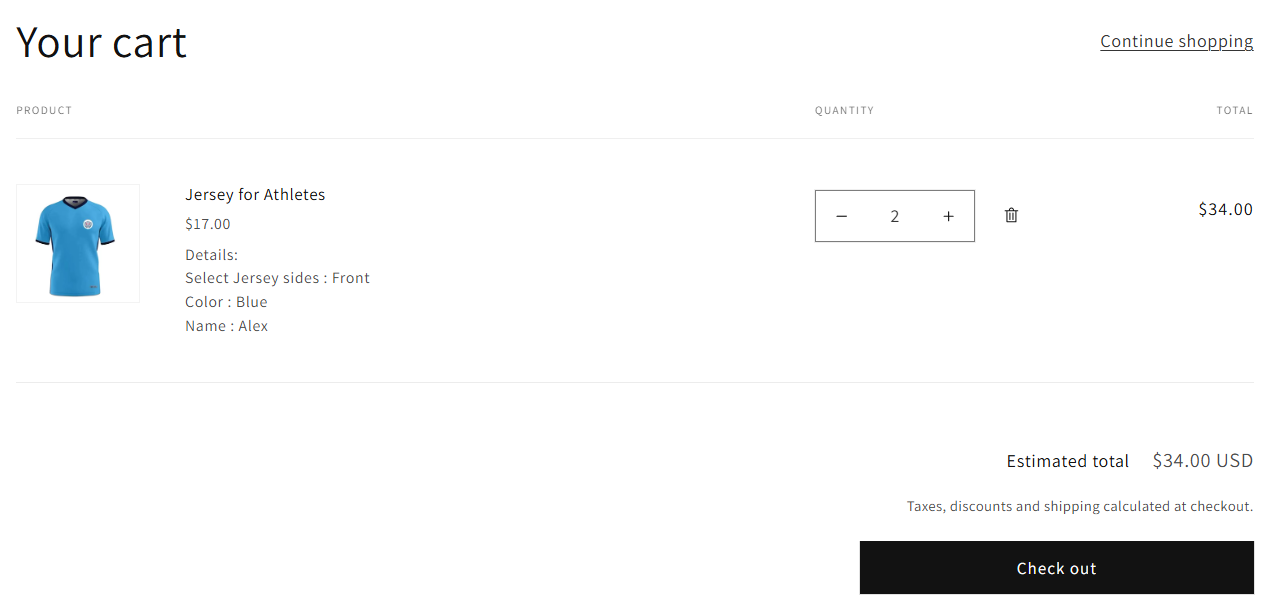
- This is the cart page: You can see all your options here
- This is the app setting:
To enable font preview, just click on the Font preview in text field and choose the text field you want
I hope this answer helps solve the problem. If you need further assistance, feel free to reach out to Easify anytime! ![]()
Hi @Half-Geisha ,
Add this code in buy-buttons.liquid block file in horizon theme inside the form tag after the first input .
.grt { border: 1px solid #ccc; padding: 10px 15px; width: 100%; max-width: 400px; font-size: 16px; border-radius: 8px; text-align: center; outline: none; transition: all 0.3s ease; box-shadow: 0 1px 3px rgba(0, 0, 0, 0.1);} .grt:focus { border-color: #007bff; box-shadow: 0 0 5px rgba(0, 123, 255, 0.5); background-color: #f9f9ff;} .grt::placeholder { color: #888; }here is the screenshot for better implementation
Hi @Half-Geisha
If you are thinking of trying any app to add a personalization text box to your product page of the Horizon theme, I will recommend the Inkybay-Product Personalizer app.
Inkybay allows you to easily create custom input fields for short and long text with its product option feature. You can also set an additional price for the added text. The added text shows on the cart page, and it is also included in the order file generated by Inkybay.
Without any coding, you can set up the personalization text box for your product using Inkybay. You can try the free trial and see how it works. If you want, we can share a demo product with you.
How the product options appears in the product page:
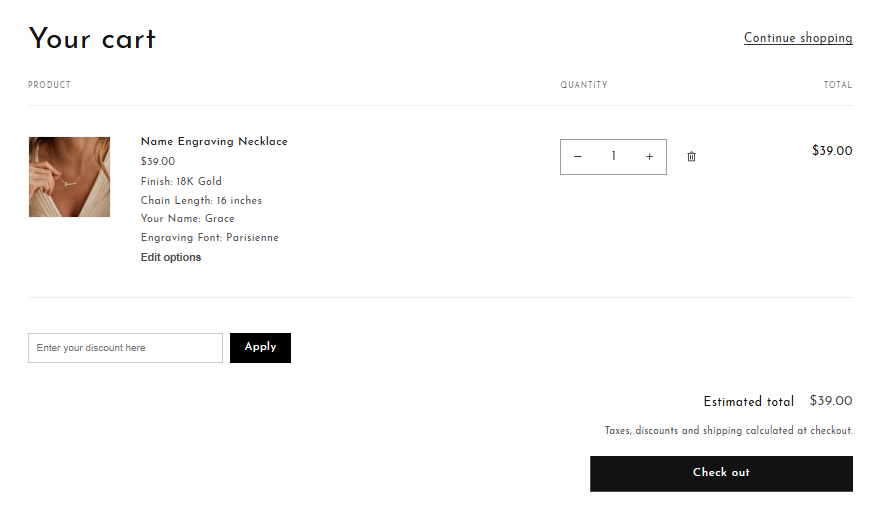
How the product options appears in the Cart page:
What is this supposed to do because that adding a input field in the buy now button doesnt carry any of that inputted text into the cart?
Previously, one could link line item property inputs to the add to cart form by specifying the form property on the input element.
This could be done in the section liquid code or in Custom liquid block inside Product info section.
<input form="product-form-{{ section.id}}" type=text name="properties[LIP]" />
However, with Horizon, form id is now calculated based on Buy Buttons block id, which in Liquid is not visible outside this block.
One way is to get form id is to use Javascript.
In Customizer, add the “Custom liquid” block inside “Product Info” section and use code like this:
<input type=text name="properties[LIP]" />
<script>
var sid="shopify-section-{{ section.id }}",
section = document.getElementById(sid),
form = section?.querySelector('form[action *=cart]'),
fid = form?.getAttribute('id');
if (section && form && fid) {
section
.querySelectorAll('[name^=properties]')
.forEach( e => {
e.setAttribute( 'form', fid );
});
}
</script>
In a copy of the live theme, you must do the following:
Go to the code editor and search for the file buy-buttons.liquid , locate the component called
Within this, you should locate an input element like:
<input type="text" placeholder="Add Aditional Info" name="attributes[aditional_info]">
By doing this, you can add an attribute to the cart from the product form.
After this, you must go to the file main-cart.liquid and locate the section:
Where you will add the following code:
<div>{{ cart.attributes.aditional_info }}</div>
Now you can always play with this same logic to add and edit code elements using the cart attributes.
These attributes will also be inherited and visible in the order once the customer processes the order.
It is important to note that this code update may affect the functionality of your theme, so it is recommended to try these implementations carefully while always backing up an original copy of the theme in case you encounter issues in the future and do not lose the functionality of it.
I hope this helps, the key is to understand the logic.


