Non-sectioned themes
Use an app to collect customization information for products
You can install a product customization app from the Shopify App Store to easily add custom fields to your product page.
Edit your theme code to collect customization information for products
You can edit your theme’s code by creating an alternate product page template that includes custom form fields, or line item properties. You can then apply your new template to any product for which you want to collect customization information from customers.
Create a template that includes line item properties
To create a new product page template:
-
From your Shopify admin, go to Online Store > Themes.
-
Find the theme you want to edit, and then click Actions > Edit code.
-
In the Templates directory, click Add a new template.
-
Choose product from the drop-down menu, and name the template customizable:
-
Click Create template. This creates a copy of your product.liquid template called product.customizable.liquid.
Create custom form fields
You can add as many custom form fields to your product page as you need. You can use the Shopify UI Elements Generator tool to easily generate the HTML and Liquid code for each form field that you want to add to your cart page. This tool was created by Shopify to help simplify the process of adding custom user interface elements, such as form fields and icons, to Shopify themes.
-
Go to the Shopify UI Elements Generator.
-
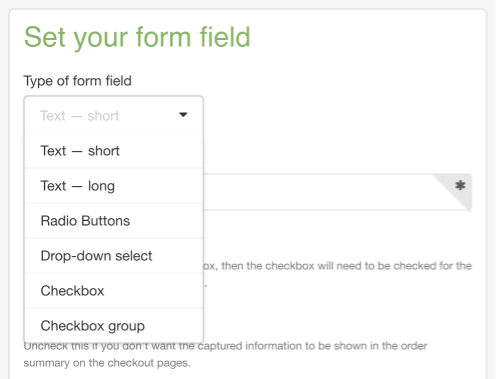
In the Set your form field section, select the type of form element that you want to use from the Type of form field drop-down menu:
-
Check Required if you want your theme to prevent customers from adding a product to the cart before they have filled in your form field.
-
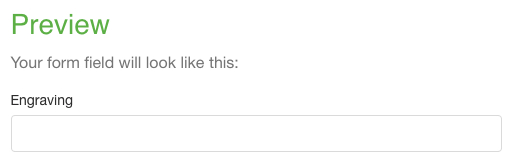
You can see a preview of your form field in the Preview section:
-
Copy the generated code from the box in the Grab your code section:
Add custom form fields
To add custom form fields to your template:
-
From your Shopify admin, go to Online Store > Themes.
-
Find the theme you want to edit, and then click Actions > Edit code.
-
In the Templates directory, click product.customizable.liquid.
-
Find the code type="submit" in the file. This is part of the code for the Add to cart button. On a new line above the block of code that contains the Add to cart button, paste the form fields for your product customization:
In the above example, the form field code adds an Engraving field where customers can enter text for a custom engraving. The line where you place the code determines where the form field will appear on your product page. You can experiment with putting the code in different places in the file.
-
Click Save.
To make the new form fields appear on product pages, you need to set your customizable products to use the new product.customizable.liquid template that you created.
Apply your new template to a product
To apply a template to a product:
- From your Shopify admin, go to Products > All products.
- Click the name of the product that will use your new template.
- In the Theme templates section, choose
product.customizable from the Product template menu.
- Click Save.
The custom form fields that you created will now appear on that product’s page. Repeat the steps to enable the template on multiple products. You can use the bulk editor to enable your template on many products at once.
Allow file uploads
If you create a form field input with the attribute type="file", then the customer’s browser will show a file upload button for that form field. As a store owner, you can view any files that your customers upload. Letting customers upload files allows for some creative store ideas — like printing customer artwork onto canvas or accepting custom graphics to print on clothing.
If the form in your product-template.liquid contains a file upload field, the form tag in your customizable product template must have the attribute enctype="multipart/form-data".
Note: File uploads will work only on a page style cart, and are not compatible with cart drawers or cart popups. To change your cart style, go to the theme editor.
Show customizations in the cart
If your theme doesn’t display customizations in the cart, then you can add some code to your cart.liquid file to check for line item properties and display them if they exist.
Show line item properties in the cart
To show product customization information in the cart:
-
From your Shopify admin, go to Online Store > Themes.
-
Find the theme you want to edit, and then click Actions > Edit code.
-
In the Templates directory, click cart.liquid.
-
Find the line containing the code {{ item.product.title }}. On a new line below, paste the following code:
{% assign property_size = item.properties | size %}
{% if property_size > 0 %}
  {% for p in item.properties %}
    {% assign first_character_in_key = p.first | truncate: 1, '' %}
    {% unless p.last == blank or first_character_in_key == '_' %}
      {{ p.first }}:
      {% if p.last contains '/uploads/' %}
        <a class="lightbox" href="{{ p.last }}">{{ p.last | split: '/' | last }}</a>
      {% else %}
        {{ p.last }}
      {% endif %}
      <br>
    {% endunless %}
  {% endfor %}
{% endif %}
-
Click Save.
This code checks each line item to see if it has any line item properties, and displays them if they exist.
Update links that remove items from the cart
Any links that remove items from your cart will need to be updated to work with custom line item properties:
- From your Shopify admin, go to Online Store > Themes.
- Find the theme you want to edit, and then click Actions > Edit code.
- In the Templates directory, click
cart.liquid.
- Find any
a tag that has an href value starting with /cart/change.
- Change the full
href value to href="/cart/change?line={{ forloop.index }}&quantity=0".
- Repeat these steps for every
a tag in cart.liquid that has an href value starting with /cart/change.
- Click Save.
Update item quantity fields in the cart
Any fields that display item quantities in your cart will also need to be updated to work with custom line item properties:
- From your Shopify admin, go to Online Store > Themes.
- Find the theme you want to edit, and then click Actions > Edit code.
- In the Templates directory, click
cart.liquid.
- Find any input tag that has an name value of
updates[{{ item.id }}].
- Change the full name value to
name="updates[]".
- Repeat these steps for any
input tag in cart.liquid that has an name value of updates[].
- Click Save.
Show customizations in email templates
You can optionally also display line item properties in email notifications. This will let customers see their product customizations when they receive an email about their order.
-
From your Shopify admin, go to Settings > Notifications.
-
Click the name of the notification template that you want to add line item properties to.
-
Find the following code:
{{ line.title }}
Replace it with:
{{ line.title }}{% for p in line.properties %}{% unless p.last == blank %} - {{ p.first }}: {{ p.last }}{% endunless %}{% endfor %}
-
Click Save.
Repeat these steps for any other email notifications that you want to include line item properties.
Hide line item properties (optional)
Line item properties that you have built into your customizable product templates are visible on your product pages and, if you have customized your cart code, on your cart page as well. Line item properties are also visible on the checkout page. There might be times when you do not want a line item property to be visible to the customer, for example, if you want to attach some internal information (such as a bundle ID or tracking number) to a product.
If you want a line item property to be hidden on the cart or checkout pages, then you can place an underscore _ at the beginning of its name value. For example, the name value for an internal Bundle ID might look like this:
name="properties[_bundle_id]"
If you did not use the code in this tutorial to show line item properties (or customizations) in the cart, then your theme code might not include the code that keeps line item properties with name values beginning with an underscore hidden. To modify your theme code to hide line item properties in the cart, you can add the following lines of code to your cart-template.liquid or cart.liquid file:
{% assign first_character_in_key = p.first | truncate: 1, '' %}
{% unless p.last == blank or first_character_in_key == '_' %}
The results should look similar to this:
{% assign property_size = item.properties | size %}
{% if property_size > 0 %}
  {% for p in item.properties %}
    {% assign first_character_in_key = p.first | truncate: 1, '' %}
    {% unless p.last == blank or first_character_in_key == '_' %}
      {{ p.first }}:
      {% if p.last contains '/uploads/' %}
        <a href="{{ p.last }}">{{ p.last | split: '/' | last }}</a>
      {% else %}
        {{ p.last }}
      {% endif %}
    {% endunless %}
  {% endfor %}
{% endif %}
Showing line item properties at checkout.
Line item properties will only be visible to customers during checkout if they are stored as a string. Numbers will be hidden, though they will still be tied to the order and show up in the Admin > Orders screen. For example:
line_item_prop: "1234" (will be visible on the Order and during checkout)line_item_prop: 1234 (will be visible on the Order and hidden during checkout)
For context, this was introduced as a feature because line item properties were often used to store IDs which were not intended to be customer-facing. So theme developers can hide line item properties during checkout by storing them as an integer or a string with an underscore at the beginning.