Non-sectioned themes
Authorizing payment for pre-orders
When selling products as pre-orders, you should not capture payment immediately unless the customer is aware that they are purchasing something that is not currently available. Instead, you can authorize a payment without capturing the funds immediately. Authorizing a payment at the time of checkout allows you to capture the funds at a later date, when the product is available and you are ready to fulfill the order.
Note: If you communicate to your customers that you are charging them in advance for an item that will ship at a later date, then you can capture funds immediately for a pre-order product.
-
From your Shopify admin, go to Settings > Payment providers.
-
Scroll down to find the Payment authorization section.
-
Select Manually capture payment for orders:
-
Click Save.

Caution: Authorization periods expire after a certain period of time. After an authorization expires, you may no longer legally capture payment for that order. Shopify Payments has an authorization period of 7 days. To authorize payments for a longer period, you must use a third-party payment gateway.
Creating a pre-order product page template
To change the Add to cart button text for your pre-order products, you must create a new product template.
-
From your Shopify admin, go to Online Store > Themes.
-
Find the theme you want to edit, and then click Actions > Edit code.
-
In the Templates directory, click Add a new template.
-
From the drop-down menu, select product, and name the template
pre-order: -
Click Create template. Your new
product.pre-order.liquidtemplate will open in the code editor. -
Find and replace the Add to cart button text.
-
Look for this code:
<span data-add-to-cart-text>
  {% unless current_variant.available %}
  {{ 'products.product.sold_out' | t }}
  {% else %}
  {{ 'products.product.add_to_cart' | t }}
  {% endunless %}
</span>
Replace it with:
<span data-add-to-cart-text>
  {{ 'Pre-order' | json | remove: '"' }}
</span>
In the same file, look for a tag that contains this line of code:
addToCart: {{ 'products.product.add_to_cart' | t | json }},Replace it with:
addToCart: {{ 'Pre-order' | json }},Every theme is different, and the code used for the Add to cart button text may vary. If you replace instances of
products.product.add_to_cartwithPre-order(leaving all other punctuation intact), then your Add to cart button text should change to read Pre-order instead.Note: If you can’t find the above lines of code, then they might be found in your theme.liquid file instead.
-
Click Save.

Assigning the template to a product
-
From your Shopify admin, go to Products > All products.
-
Click the name of the product you want to make available for pre-order.
-
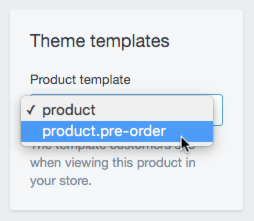
In the Theme templates sidebar section, change product to product.pre-order:
-
Click Save.
Inventory levels
If you are tracking inventory for a product, then you might want to allow customers to purchase pre-order products even if they have an inventory amount of 0.
To edit the inventory settings for a product:
-
From your Shopify admin, go to Products > All products.
-
Click the name of the product you want to make available for pre-order.
-
Click Edit next to the first variant:
-
Check Allow customers to purchase this product when it’s out of stock:
-
Click Save.
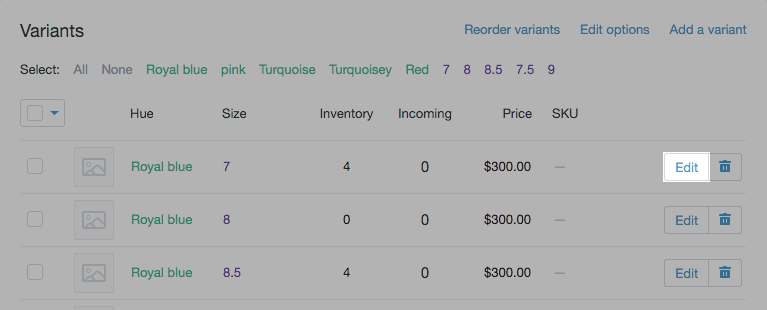

Note: This setting is available for each variant, so you must change the setting for each one that you would like to be available for pre-order. You can edit all the variants of a product at the same time by using bulk editing.